Wednesday, September 26, 2018

Mozzarella

I thought I'd try making cheese - something I've always been interested in, but never got around to trying.  I started from a recipe I found here.  However, I've tweaked some amounts based on how ingredients come here, and I've used a conversion I found here to substitute lemon juice for citric acid tablets.

3 litres of whole, unhomogenized pasteurized milk
1/4 cup + 2 tsp lemon juice
1/4 rennet tablet
1/4 cup dechlorinated water

Dechlorinate the water ahead of time by letting it sit, in as much sunlight as possible, for 24 hours.  Or boil it and return to room temp.  Dissolve rennet in water.  Milk + lemon juice in a thick-bottomed pan.  Heat to 90 F.

Add rennet.  Cover and wait 10 minutes and check.  Repeat (this, in my limited experience, usually takes _at least_ a couple of cycles) until the curd has solidified and the whey is reasonably clear and yellowish.  Cut into 1 inch squares, making sure to get right to the bottom of the pan.  Let sit for 5 minutes, to express the whey.

Heat to 105 F, stirring gently and occasionally; you're not worried about breaking up the lumps of curd particularly, but you aren't trying to mix them back in either - don't overdo the stirring.

The recipe then says to spoon the curds out.  I tried this the first time and found it nigh-impossible to catch the slimy little things.  This time I'm trying a colander over a bowl to catch the whey.  This seems to have worked all right, though you have to keep rolling the colander around to drain properly.
Let rest for 10 minutes.

At this point the recipe says to use the whey to heat the curds - heating the whey to 180 F, then dipping the curd in repeatedly until it is hot enough to stretch.  When I tried this the first time, I found the pot wasn't deep enough to really get at things properly.  The videos I've watched online, however, show the curd heated until it stretches by pouring salted hot water over it in a bowl.  I compromised by heating the whey to 180 F, adding a bit of salt, and pouring it over the curd in the bowl.  Started with about half and added more as I needed more heat.  You need to get the cheese to ~135 F, apparently, so the liquid needs to be hotter than that, and you'll want to wear gloves.  When it's hot enough, it will stretch without tearing and look, essentially, like string cheese...

Stretch it out two or three times, then glob it together in a mass, hold a thumb and forefinger together in a loop, and push the cheese through - essentially stuffing it inside itself.  This makes nice smooth-sided balls.

You can twist off multiple balls at this point.  Mash the open bit at the end together a bit to seal it, and drop the balls into a bowl of cool water, so they retain their shape.  Salt lightly.

Eat.

Sunday, November 22, 2015

Cider? I Hardly Knew Her!

Always kind of wanted to try a cider from scratch.  And since our good friends Kelly and Jason turned up on our doorstep with 20 gallons of apples from their tree, it seemed a good time to get off my butt and actually give it a try.  Found a link online with some hints on how to make a cider press from a car jack, and tweaked it to work with the bits I had available.  There's not a lot to say, really; just a series of photos in progress:
Apples

Chopping apples, with an appropriate tool

Chopped

Smashing chopped apples, also with an appropriate tool

Muslin and nylon mesh; various sources suggested either for filtering, so I used both

Bucket in the press

Car jack pushes on 3/4" ply disc


Jack's a bit short, so used a wood block to extend it's reach


Presto; juice!
Original SG: 1.054.  Which would be respectable for a beer...Pitched Red Star Cotes des Blanc dry wine yeast, with some nutrient booster, both stolen from Bill who is a much better-prepared brewer than I.  Thanks Bill!

Thursday, March 27, 2014

The Mark II MartiDNA: This Time with Presentation

Still making them with blackberries and pineapple, but the first version was, as reported, a bit too bacony (it hurts me physically to type that phrase...)  So if I need grease for the effect, but don't want an overpowering flavour, I'm going to go with ghee; whipped some of that up - always fascinates me to watch the layers of the butter settle out.  (Also, forgot to mention in the previous recipe that it should sit 5-10 minutes after the grease is added and before the pineapple.)  Swapped to gin to make it a proper martini - yes, all right, the raw DNA probably disqualifies it, but gin tastes better - garnished, and got it out of the test tube.  The Vermouth was left out more because we don't have any in the house than from any great religious strictures as to dryness.


Enjoy with a side of geeky card games and puppies.

Tuesday, March 25, 2014

MartiDNAs - the Recombinant Cocktail

Name's going to need some work...  but lets see what it tastes like first.

In my bioinformatics lecture today we discussed extracting DNA, and the fact that you can do it in your kitchen.  Sounds like fun!  It includes a source of DNA - strawberries, particularly, are mentioned - a splash of salt, a blender, an enzyme to break down the proteins - meat tenderiser is suggested, but pineapple juice is listed as a possible backup - and some alcohol.

Tell me I'm not the only one who's thinking that sounds like a pretty reasonable cocktail.

Two potential problems.  The alcohol they suggest using is 70-95% isopropyl or ethyl.  They don't give me any reason to believe that the type is important, but its possible that vodka will be too dilute.  I'll have to try it and see.

Harder: there's a stage I skipped, in making this sound like a cocktail recipe; mixing in detergent to break down the cell walls.  Not too keen on detergent in my martidna.  That page suggests that grease might work as well, but Dr Caporaso wasn't sure (and I'm not really sure I want bacon grease floating around in my martini-glass either...)

To the Experimentiser!
-----

Cocktails... For Science!


Armed and dangerous; no strawberries to be had, so we're going with blackberries.

1 cup blackberries
1/4 tsp. salt.

Blended, strained, and split in half.
Half gets 1 tbsp dish detergent.  Half gets 2 tbsp bacon grease.  Bacon grease on the left, control with detergent on the right.
Two test tubes filled 1/3 with each mixture, for 4 in total. White Labs yeast containers make the best test tube shot glasses ever!  Small amount (~1/2 tsp?) of fresh-blended pineapple added to each.  (It didn't say how much to use, but it's as an enzyme, so I guessed I didn't need much.)  Stirred gently.  One tube of each type floated in 70% isopropyl, the other in vodka.  DNA gently drawn up with a stirrer.
 Control #1: 70% isopropyl, and detergent; do not drink!  DNA is subdued but clearly visible white cloud.
 Control #2: Vodka and detergent; won't kill you, but _I'm_ not tasting it.  DNA is, if anything, far clearer, though I may have just stirred it better.
 Control #3: 70% isopropyl and bacon grease; do not drink!  Additional visiblity almost certainly due to better light for the photo.
 Vodka and bacon grease: safe to drink and DNA still clearly visible.  Success!
 Verdict: drunk layered - the only way you can see the DNA - it tastes like straight vodka.  Add an olive and wave some vermouth in the general direction of its shadow.
 Drunk blended - because why waste all that fruit - it tastes... a bit much like bacon, to be honest.  Next time I'll use less fruit, in a proper martini glass, and leave it layered.

Monday, February 17, 2014

Black IPA Take 2 Espresso Shots and Call Me in the Middle of the Night

Yeah all right; the last thing this beer needs is to get more complicated.  But I was bored, so I chucked a couple ounces of coffee in, just for giggles.

Grain Bill:

10 lbs Pale Malt (2 Row) US Grain
2 lbs Rye Malt Grain
1 lbs Caramel/Crystal Malt - 10L
10 oz Special Roast
5 oz Blackprinz
5 oz Carafa I

(Half-and-half on the Carafa and Blackprinz - mostly because that's how much Blackprinz I had left.)

5 gallons at 170, iced to 152.  Dropped a bit again it was 148 with 20 minutes left, so I topped it up with boiling to get it back to 150.  Batch sparged at 168.  Used a siphon to get it into the brew kettle (normally I just drop-pour from countertop-height.  Makes less mess, and probably preserves temperature better, but it makes it hard to tell when its running down and needs a new batch.

60 min .75 oz Warrior [15.4 %]
45 min .25 oz Warrior [15.4 %]
10 min 1.0 oz Cascade [6.4% AA 5.9% BA]
10 min 1 tsp Irish Moss
5 min 1.0 oz Citra [14.1% AA 5.9%]


2.5 oz. fresh-ground coffee, as it went in the cooling bath.

Initial SG: Totally forgot to take it.

Sunday, February 2, 2014

Black Rye IPA take 3

Grain Bill:

10 lbs Pale Malt (2 Row) US Grain
2 lbs Rye Malt Grain
1 lbs Caramel/Crystal Malt - 10L
10 oz Blackprinz
10 oz Special Roast
2.0 oz Carafa I

(So substituting 10 oz. of  Blackprinz for most of the Carafa.)

5 gallons at 165 was about perfect, if not a smidge low - read the initial temp as 152 but I usually don't lose any and it was 148 when I finished.  Which makes me wonder about that last run taking so much ice to drop the temp...  Batch sparged at 168. 

60 min .75 oz Warrior [15.4 %]
45 min .25 oz Warrior [15.4 %]
10 min 1.0 oz Cascade [6.4% AA 5.9% BA]
10 min 1 tsp Irish Moss
5 min 1.0 oz Citra [14.1% AA 5.9%]

Tried using the new cooling coil and it was a cluster from start to finish: couldn't keep the cold water running through the coil.  Clearly, engineering will be required.

Initial SG: 1.052
Final SG: 1.006

The huge difference between initials between this run and the last - with essentially the same grain bill and apparatus - makes me suspicious, and I caught myself wondering if I read the wrong side of the thermometer.  52 C (my thermometer doesn't have the third digit written on...) would be about 126 F, which would explain why the last batch needed so much cooling, but then I'm wondering if I would have got as _much_ SG out of the last one if the temp was _that_ low.

Sunday, January 26, 2014

Black Rye IPA take 2

The last time I tried this recipe I accidentally grabbed a bunch of the dry hops when I kegged it, which led to the keg lines getting clogged with hops, and having to open the lid on a pressurised keg of beer, with ensuing shenanigans.  Still, I saved maybe half the keg, much of which got drunk flat, and still kind of liked it.  So I'm giving it another go.

I haven't brewed anything in almost a year, since the local homebrew shop shut down.  It takes so much more organisation when I can't just pop down of a morning and be brewing some suggestion from the brew shop guy an hour later.  But since I was getting organised in advance, I decided to do something I've wanted to do for awhile; make the same beer several times in a row, with minor variations.  So with the helpful assistance of Bill, who picked up my supplies on a run down to Prescott, and lent me his mill, we're going to do this a few times.

Grain Bill:

10 lbs Pale Malt (2 Row) US Grain
2 lbs Rye Malt Grain
1 lbs Caramel/Crystal Malt - 10L
12.0 oz Carafa I
10 oz Special Roast

(Note the Carafa III got converted to the much lighter Carafa I, because that's what they had - though I did get some of another substitute that will be part of the experimentation.)

Never actually milled my own grain before, so that deserves a picture:

With my anemic little 12v battery drill...
With Mike's industrial strength Torque-mada.  I'm sure there's a horribly macho metaphor there, but if you're doing your metaphorical with that much torque, you're doing it wrong.
5 gallons at 170 - my usual mash water for this much grain - was still WAY too hot.  Had to dump tons of ice in it to drop the temp down to 152.  Next time drop to at least 165.  Batch sparged at 168. 

60 min .75 oz Warrior [15.4 %]
45 min .25 oz Warrior [15.4 %]
10 min 1.0 oz Cascade [6.4% AA 5.9% BA]
10 min 1 tsp Irish Moss
5 min 1.0 oz Citra [14.1% AA 5.9%]

Initial Gravity: 1.044 (not a great yield for that much grain...)
Wyeast 1065 American Ale pitched at 80F.

Fermentation took a mere 4 days - blowing the lid off once - but was down to 1.002 and quiet so I reckon it was at least mostly done.  Transferred to the secondary fermenter on the evening of the 30th, and added:

1.0 oz Cascade [6.4% AA 5.9% BA]
1.0 oz Citra [14.1% AA 5.9%]

in a hops sock.

Sunday, October 27, 2013

Pig Too!

The second ham is up, and this time we tried our brand-new smoker on it. 
 Its a hot smoker, which isn't _really_ the right tool for the job; the bit we've cut so far has lost that lovely red color and looks more like cooked pork.  Might have to smoke it at a lower temperature next time, but the start on the lowest setting wasn't making any smoke.  Still, it tastes great - here with a bit of homemade sourdough, from the starter that Monet gave us - thanks Monet!

Tuesday, April 30, 2013

Experimental Subject 1a - Report1 (Not Dead Yet)

Hurrah!

Its been 6 months since Alan (named for the British cab driver who donated his body to be mummified - For Science!  No relation.) got hung up to dry and its time to find out if he's going to make us horribly horribly ill.
Its not that I don't trust my methods but... well, I've never done this before, and that lump of meat has been hanging around in my cellar for the last 6 months.  That is officially... outside my realm of instinctive comfort.  If I die, I will my stuff to my family, my body to science, and the ham to Doctor Nik.  If I do die, I'm not going alone:


I know that looks a little spotty in the photo, but the mold is actually pretty spare considering, and its all on the surface.  It washed off pretty nicely, but I'm shaving off the outside layers anyways.  First inside peek looks pretty decent:

 
 Here it is posing with some fresh bread, a 12-month old Manchego and a glass of Chilean Malbec.  I must say its pretty tasty.  If we make it to the weekend we may consider it safe to share.


Saturday, March 30, 2013

Black Rye IPA(ish)

Bit obsessed with ryes lately, and wanted to do a dark rye.  Found this recipe for a Black Rye IPA, which sounded intriguing (if possibly a bit busy) and figured I'd give it a go... but the brew shop didn't have all of the hops the recipe called for.

Original recipe:

10 lbs Pale Malt (2 Row) US Grain 70 %
2 lbs Rye Malt Grain 14 %
1 lbs Caramel/Crystal Malt - 10L Grain 7 %
12.0 oz Carafa III Grain 5 %
10 oz Special Roast Grain 4 %

Batch Sparge, Single Infusion, Medium Body, No Mash Out 154.0 F

60 min .75 oz Warrior [17.20 %] (60 min) Hops 41.7 IBU
45 min .25 oz Warrior [17.20 %] (45 min) Hops 12.8 IBU
10 min 1.0 oz Cascade [5.90 %] (10 min) Hops 6.9 IBU
15 min Whirlfloc Tab (Boil 15.0 min) Misc
5 min 1.0 oz Citra [12.40%] (Boil 5 min0 Hops 8 IBU

final volume of 5.50 gal

Safale US-05 Yeast-Ale- Saved from last batch

1.0 oz Citra [12.40 %] (Dry Hop 10 days) Hops -
1.0 oz Cascade [5.90 %] (Dry Hop 10 days) Hops -
-----

They don't do dry yeasts much anymore, but this is an easy equivalence:


Dry Yeast    Wyeast Liquid    White Labs Liquid
Safale US-05    1056           WLP-001


So I went with the White Labs American Ale yeast.

Apparently Citra gets snatched up by all the professionals... but honestly I didn't mind much, as I'd prefer to tone the hops down a bit anyways.  So I ended up with:

60 min .75 oz Warrior [16.00 %] (60 min) Hops
45 min .25 oz Warrior [16.00 %] (45 min) Hops
10 min 1.0 oz Cascade [6.40% AA 5.9% BA] (10 min) Hops
10 min 1 tsp Irish Moss
5 min 1.0 oz Cascade [6.40% AA 5.9% BA] (10 min) Hops

I plan to taste it when I keg it and decide whether to replace the Citra with Cascade in the dry hops, or just leave it out altogether.

Initial SG: 1.050

Saturday, January 19, 2013

Rye Saison

Had an interesting rye beer over the holidays (don't remember what at this point; Sierra Nevada holiday brew of some sort, perhaps?) and decided to give one a try. Found this recipe that sounded interesting, and decided to give it a try. Here's the original, in case that forum post goes away:

-----
How Rye I Am - A Rye Saison (15.5 gal.)
Amount Item Type % or IBU
1 lbs Rice Hulls (0.0 SRM) Adjunct 2.70 %
25 lbs Pilsner (2 Row) Bel (1.8 SRM) Grain 67.57 %
9 lbs Rye Malt (2.9 SRM) Grain 24.32 %
4.00 oz Styrian Goldings [5.20 %] (60 min) Hops 24.4 IBU
2 lbs Candi Sugar, Dark (275.0 SRM) Sugar 5.41 %
French Saison (Wyeast Labs #3711) [Starter 4000 ml] Yeast-Ale Mash Profile

Mash @ 152* for 60 minutes. We mashed thin at 1.8qt/lb.

Notes Grain to glass in 7 weeks. Competiton entries (first round) were 8 weeks old. Carbed to 2.7 volumes of CO2. We underpitched by about 20% as to stress the yeast a little for more ester production.
-----

I asked the brew shop guy to help me scale it down to a 5 gallon batch, and then a few things got tweaked, so I ended up with:

 0.5 lbs. Rice Hulls
8 lbs. 2 row
3 lbs. Rye Malt

Mash @ 152* for 70 min. 1.4 qt/lb.

1 lb. Dark Belgian Candi Sugar
1.5 oz. Styrian Golding (AA 3.8% BA 4.0%)

Boil 50 min.

0.5 oz. Styrian Golding (AA 3.8% BA 4.0%)

Boil 10 min.
Belgian Saison yeast.

Notable differences being:
* more hops; lower acid.
* slightly more sugar and rice, because I couldn't be buggered to divide up the packages and then leave myself with weird amounts I'd never use.
* left 1/4 of the hops out til the last 10 mins, to get a bit of flowery late-hops flavour.

1.050 initial SG.

Saturday, October 27, 2012

Goldilocks' Chocolate Stout

Grabbed a all-grain chocolate stout kit from the brew shop (forgot the grain bill _again_.)  8.5 lbs grain = 11 liters = 3 gallons @175 F.  Added the grain and it was too hot.  Dropped some ice in and it was still too hot.  Dropped some more ice in and it was still too hot.  Dropped about a quart of tap water in and it was too cold.  Boiled the kettle and poured it in - 3 times! - and it was still too cold.  4th kettle and it was close enough (148 F) that I started the timer while boiling it one more time.  Bloody hell!

The only thing I can think of to explain it is that the first batch of ice did the job, and I didn't stir well enough or wait long enough for the thermometer to register the change.

Aaaaanyways, the low grain bill is in part because we add 10 oz dextrose, an 12.5 oz lactose.  I'm also adding 3.15 oz (90g - 1 wheel) of Mexican drinking chocolate, finely ground.  All of that went in the wort.

3/4 oz UK Challenger (AA 6.5%) @ 1 hour.
1/4 oz UK Challenger (AA 6.5%) @ 15 min.

initial SG 1.040

Sourdough Baguette

Baking appears to be at least as much chemistry as cooking, so I thought I'd better take notes as I'm experimenting with a new (to me) recipe.  Here seems as good a place as any.

Laur gave me a sourdough starter, and I'm playing with it.  Starting from here, making some adjustments based on the adjustments that worked for my other baguette recipe, and some from a page Laur gave me on making sourdough sourer.  Keeping the adjustments small to start, figuring I can tweak more later once I've seen how well it worked.

Fed 60g of starter (down 5g, for extra sour) with 70g water and 70g flour.  Using Gold Medal unbleached all-purpose flour throughout.  I was supposed to let that sit for about 6 hours according to the recipe - I gave it more like 15, because I didn't feel like doing the second step at 1am.  We'll see if that matters, but the be-more-sour guide recommends lengthening and slowing the growth stages, so I think its all to the good.

Mixed:

600g flour
187g starter mix (200 less the scrapings in the bowl, down a bit for extra sour)
400g water

into a shaggy mess in a bowl.  (I'll try this recipe in the bread-maker later, but I want the by-hand version to compare it to.)  Sit for ~25 minutes to autolyse without the salt (which I've never done before.)

Knead for 5 min.  Realise I've forgotten to add the salt before kneading; add 15g salt (up a bit for retarding yeast growth at altitude) and knead for 30 sec more.  Cover with a towel and let sit on the counter for an hour.

Fold the dough over itself a dozen times.  Cover with a towel and let sit on the counter for an hour.

Fold the dough over itself a dozen times.   Cover with 2 layers of plastic wrap (opposite directions, so it can rise without exposing itself) directly on the surface of the dough.  Put in fridge for 12 - 24 hours.

Ohhhhhhkaaaaay.  Didn't rise.  At all.  How is that even possible?

Thursday, October 25, 2012

Still More Ham

Hanging ham in the Tomb.

Day late, but hung the ham today.  Thorough rinse in cold water, followed by white wine vinegar, followed by wrapping in still-wet muslin that had soaked in the vinegar for half an hour.  (The muslin, as near as I can tell from most sources, is to keep the flies off.  This shouldn't be necessary here, and I have seen photos of people drying their hams in open-weave mesh bags, but I figured safer was better than sorry.)  Cellar is currently 55 degrees F and 61% humidity.
Cheesy meter came free with Time magazine, but it seems to read reasonably accurately, as double checked against local weather reports when its outside.

Wednesday, October 10, 2012

More Ham

In my somewhat-hurried research, I found basically two different ways to salt the ham.  One is to completely bury it in salt, and put weight on it.  This makes the pressure omni-directional, which is good for squeezing out the liquids, but it has some drawbacks: 1) you need to rig up some way to drain the liquid off, 2) working around the bone - to keep it from supporting the weight and keeping the meat from getting pressed - can be difficult, and 3) it takes a heck of a lot of salt.  The alternative method sounded much easier: coat the meat in salt and loosely wrap it in plastic, and press it under weight.  But the pressure then becomes kind of focused; it presses down from above instead of in from all sides.

So I went with a multiple stage solution.  First I coated it in salt, put it in a trash bag, and poked some drainage holes in the bag.  Then I set this in a roasting pan to catch the runoff, put about 12 pounds of weight on it, and put it in the fridge for 3-4 days, draining the pan occasionally.  Then I took it out of the fridge and put it in "the tomb" - the beer cellar under the garage, which stays at a pretty constant temperature of 60 F.  Here I had a bit more room, so I put a beer keg on top of it for more weight (~10 lb. keg + 5 gallons of beer = ~50 lbs.)  Lots of liquid poured off over the next week or so, and I resalted it a few times too.  During this phase I checked the humidity in the room, and its actually holding steady at about 60% - largely because of the pork juices sitting in the pan, I imagine.  Still, this makes me think leaving a pan of water in the room will be enough for the hanging stage, when Flagstaff's natural 25% humidity is really far too dry.

Yesterday was the first time I'd gone for 24 hours without really having any liquid to drain off, so this morning I transferred the ham, wide-end-down, to a food bucket with a layer of salt in the bottom.  Then I coated it with another thick layer of salt, before filling the rest of the bucket with a bag of rice in a plastic bag and a few cans, with salt packed all in around it.  The bag of rice and cans just being to take up room, so I didn't need so much salt.  This allowed me to fill salt almost all of the way up over the end of the ham bone, and then put my 50 lbs. of beer back on top for weight.

Notes from Nik and my other sources put this salting stage at anywhere from 2-4 weeks, and I figure overdoing it is better than underdoing it.  We'll see what I need to do for drainage and how much liquid continues to come out of it - I'm guessing that I'm going to have to end up drilling holes in the bottom of my food bucket.

Saturday, September 29, 2012

Making Ham

Inspired by the stalwart efforts of the Sydney ham-making crew, and Dr Nik's lurid tales of ease and success when he visited us recently, I decided to try to make a ham.  Not a wet ham, in the usual American sense, but a dry ham like the concentrated prosciutto-like awesomeness we had in Spain on our recent trip.  But where to get a pig leg?  (All together now) "Off a pig!" *boom-tish*

Ok.

This may require a little back-story.  In Flagstaff we have a lot of hunting, because of the surrounding National Forests and their teeming over-population of elk.  So we have businesses like Dennis' Coconino Game Processing, who take your elk and turn it into steaks and burgers.  But we also have a lot of what I can only describe as hippies (and I include myself in their number); only hippies of a perhaps more practical bent than their usual stereotype.  And these folks support a nascent but thriving local foods industry, spearheaded by Jonathan over at Local Alternative.  If hippies and hunting sound like a weird mix, well that right there is one of the many things I love about Flagstaff.

Anyhow, I mentioned wanting to get my hands on some fresh local pork to Jonathan at one of the monthly supper club get-togethers down at the pub, and he pretty much signed me up on the spot for a quarter-share in a 600-lb. pig, and a hog-butchering / meat-cutting class he had organised, taught by Dennis.  So today I went on down and got me just about the freshest leg of pig that it is humanly possible to obtain, in order to make my ham.

The class was awesome.  A local cheese-maker had been raising 6 hogs off of his whey, and they were big handsome beasties indeed on that diet.  Dennis showed us the initial skinning and butchering on one, Which ends you up with a pair of these:

and then that needs to sit in his cool-room for 2-3 days to get down to a usable working temperature.  So he wheeled out the one he butchered 3 days ago, and showed us how to turn it into these:
 
mmm... bacon.


Along with some chops and sausages that we took directly from the sausage machine to the BBQ for lunch, and which were, frankly, some of the tastiest sausages I have ever eaten.  Then we dropped by the store on the way home and bought like 30 pounds of salt (which turns out to be complete overkill - from the recipes I could find you don't so much pack the ham in a bucket of salt as cover it in salt and press it, refreshing the salt as necessary.)  So we took this guy:
who weighed in at 13.75 pounds, and seasoned him with pepper and crushed garlic, and then packed him in a whole bunch of sea salt
and wrapped him loosely in plastic.  (Again according to my various readings, the plastic shouldn't hold moisture in, but it should hold the salt against the pig.)  My various sources differ on whether it needs to be refrigerated at this stage.  I find it unlikely - given that ham predates reliable refrigeration by some number of centuries - but as it also predates public health standards, I've gone with storing it in the fridge for the first couple of days at least, until the salt has time to work some preservative magic.  I've got it under 12 pounds of weight (see?  that extra salt wasn't useless after all) for now, but I think I'll increase that later.

I should mention that most recipes I found specifically called for a pig leg with the skin on, and we had already skinned this lad by the time I worked that out.  So the whole thing may be a horrendous waste if that turns out to be a deal-breaker.  Only one way to find out!  Not sure how long to leave it, but the consensus seems to be at least 2 weeks before hanging it.

Tuesday, September 4, 2012

Weasel Piss IPA

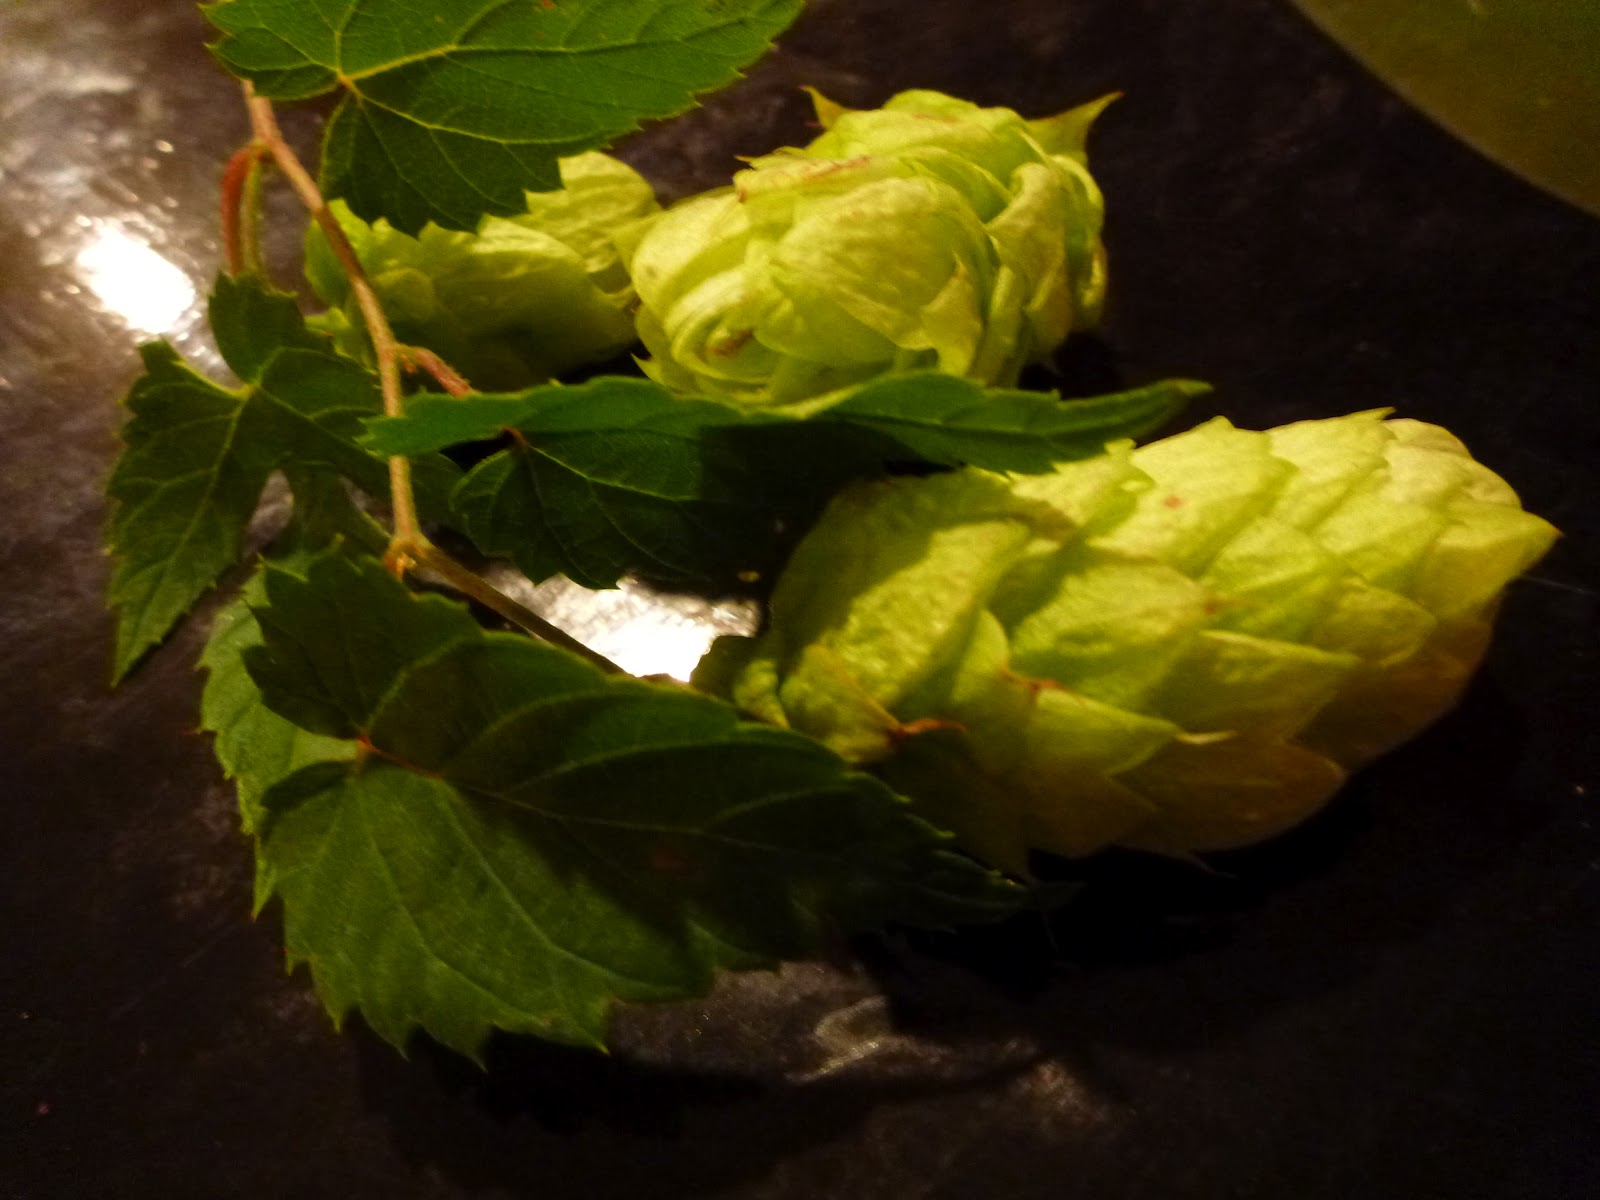
Camping last weekend we discovered a huge stash of wild hops growing next to our camp on East Clear Creek.  I collected a bunch and went in to the brew shop to ask if anyone knew anything about them.  "Yep" quoth our resident brewmeister, "tastes like cat's piss."  Well that's a bit of a let-down.


But hey!  Am I or am I not an alumni of the Festival 24-hour Alcoholic Porridge?  Did I not help to mash up the grapes of Sulphuric Lemming Juice with my own two hands?  Do I not share a lineage with Fine Banana Wine?  Should I let mere taste, expertise, and certain disappointment dissuade me from trying a thing?  I think not.

So I bought an all-grain American IPA kit, without the finishing hops.  I forgot to get a grain bill - I'll try to remember to ask tomorrow - but the last time I did one it was:

11.5 US 2-Row
8 oz. Carapils
8 oz. Crystal 40

(which can't be right, as this only came to 11 lbs.)  Mashed with 4 gallons at 152 F.  Sparged at 168 F to 6.5 gallons.  Boiled for 1 hour with:

1 oz. (dried) US Magnum (14.7% AA, 6.7% BA)

because a little research told me fresh hops aren't as good for bittering (and a random breed wasn't likely to have much acids.  Selfsame research tells me that fresh hops should be used at roughly 6 times the weight of dried, So I used:

3 oz. at 5 minutes
3 oz. at 0 minutes

(Roughly half the amounts of finishing hops used in the last American IPA.  But it was all I had, and sheesh but it was a pile of hops.)  Cats Piss, as my brew-shop-guy described these hops, turns out to be a duly trademarked name of about half-a-dozen beers.  Thus I dub thee: Weasel Piss.